Windows Containers Internals: Introduction
Introducing the series and machine setup

A while back, we did the Linux Containers Internals series, you can check it out at #lci-series. if you missed it. You will see some similarities between Linux containers and Windows containers; and of course, the OCI runtime and image specs really help in standardising the interfaces and expectations across the platforms and tooling.
In this series, we will be taking an outside-in (blackbox) look at Windows containers, using publicly available tools and documentations to tinker and investigate what goes on.
So, what are Windows Containers?
Even if you have worked with Docker, I won’t be surprised if you have never heard of Windows Containers — and I won’t judge you either. As we saw in the #lci-series, Linux Containers were the trailblazers in containerization, which most people then were referring to the containers as light-weight virtual machines to make it palatable. However, as we have seen, containers are just “contained processes” that have a virtualised view of the system, for example C:\ in a container is not the same as C:\ on the host — filesystem virtualization.
So, what are Windows Containers? They are just like the Linux containers, contained and isolated processes. However, Windows Containers come in two main variants, process-isolated and hyper-v-isolated containers. The latter is what Linux didn’t have for a long time excepts for microVMs efforts like Firecracker. Hyper-v isolated containers offer more security as the container will be running inside a utility VM.
Show > Tell
Don’t tell me, show me. So, for this series, I would like to build up from zero to hero in a hands-on approach. When you see things in action, you appreciate better.
Setup Windows Server 2022 on Azure
However, feel free to use any other alternative if you are comfortable with it. E.g. another cloud provider, local setup on a hypervisor like Hyper-V or Virtual Box, etc.
It doesn’t matter your primary machine, I would like to do all these tinkering on the cloud instead. So you can RDP into the Windows machine from any device — Linux, Mac or Windows. This also will just ensure a standard experience and I also don’t want you to mess up your primary Windows machine.
Any developer has $200 per month Azure Credits just waiting for them. To redeem, just go to Visual Studio Subscriptions - Visual Studio (microsoft.com) and click on “Sign in to my subscription”, if you don’t have an MSA, go ahead and create one then sign in to redeem your credits. Once done, do the following (or you can watch my setup recording here):
Go to https://portal.azure.com
Click on “Create a resource”
Click “Create” under the Virtual Machine part.
Fill in the details:
Resource group: create one eg.
krnl-yourname-wciVirtual machine name: eg.
wci-ws2022Security type: choose “Standard”, since this will be just for testing purposes and we might want to disable secure boot at some point later on.
Image: choose “Windows Server 2022 Datacenter: Azure Edition - x64 Gen2”
Size: choose “Standard_E2s_v3 - 2 vcpus, 16 GiB memory”
Username: e.g.
wciPassword: put at least 12 character, mixing upper/lower-case, numbers and symbols
Public inbound ports: leave it as “Allow selected ports”
Select inbound ports: can select RDP and SSH for now.
Click “Next: Disks”, leave that as is, default.
Click “Next: Networking”, leave everything as is, default
Click “Next: Management”, leave everything as is, especially auto-shutdown is important for conserving your credits when your machine is not in use.
Click “Next: Monitoring”, also leave as-is
Can skip the rest and just click on “Review + Create”
Wait for validation to complete and click on “Create”
Wait for a few minutes as your VM is provisioned.
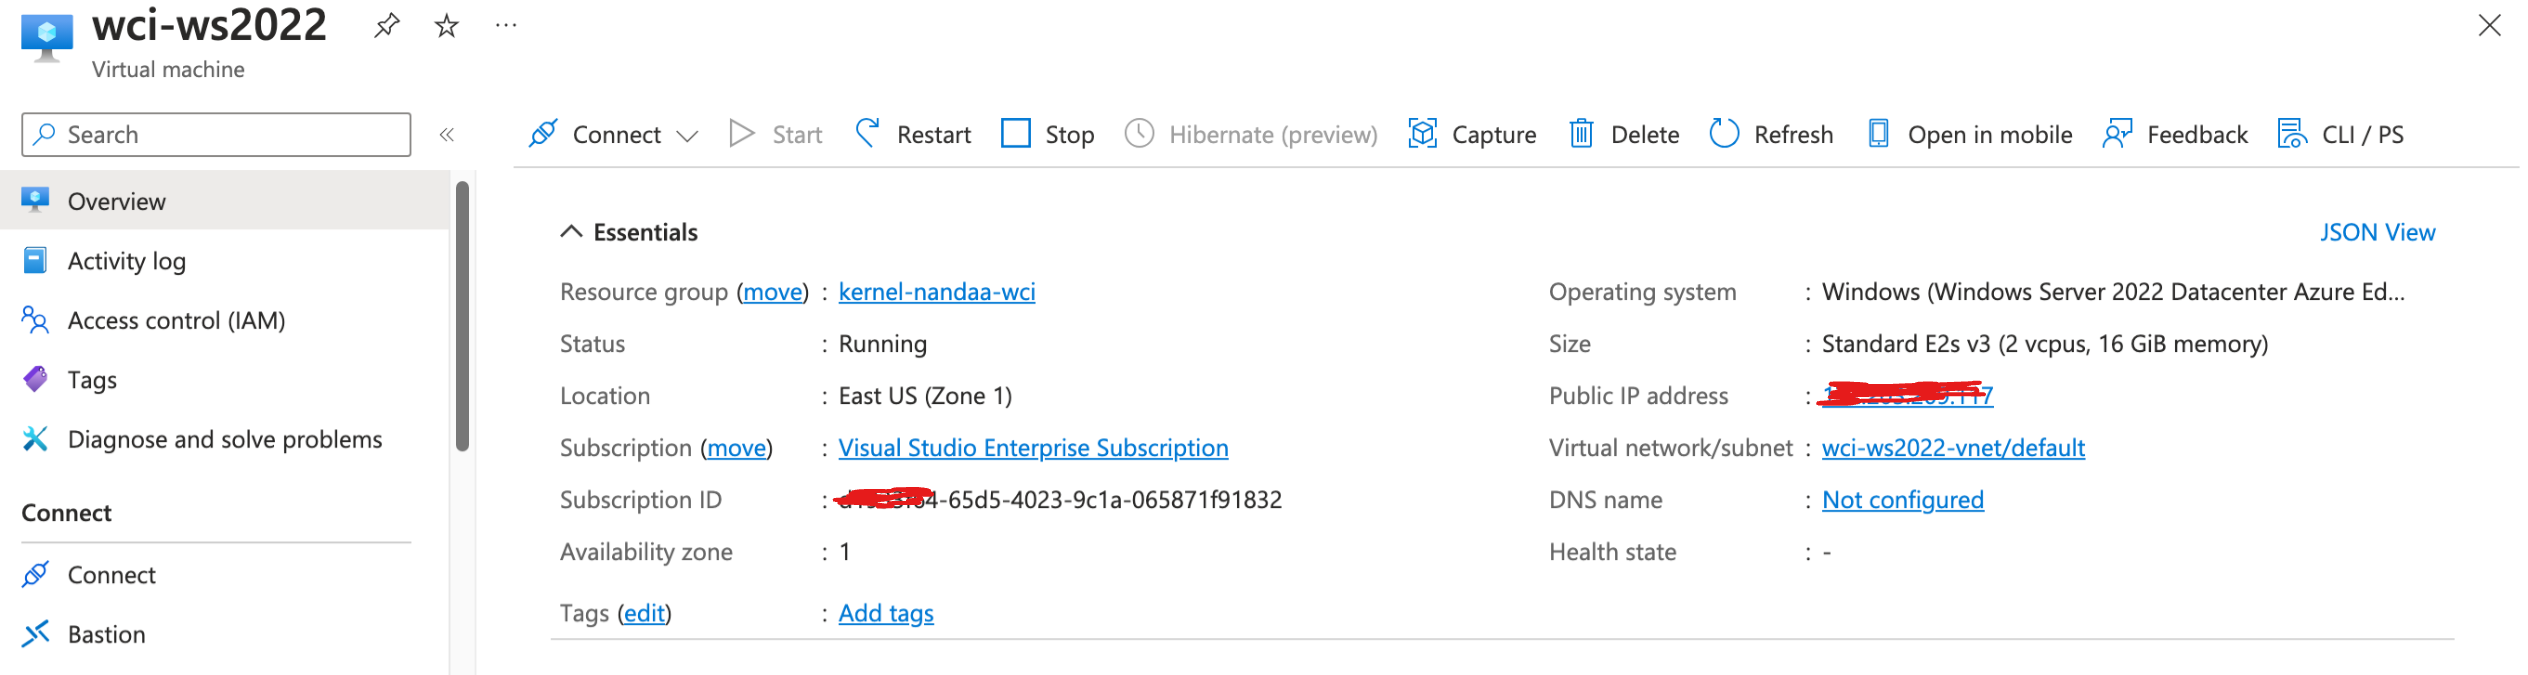
After deployment is done, click on “Go to resource”
You should have something looking like this:
Connect to the Machine
You can connect with any RDP client you have. For instance, for my case, I’m intentionally using Microsoft Remote Desktop on Mac, although my primary device is Windows. I’m doing so, so that I don’t presume some experiences, and I’m also writing this assuming my audience are predominantly on UNIX (Mac, Linux) folks. From Ubuntu you can install Remote Desktop Viewer and from Windows you can use Remote Desktop that already comes with Windows.
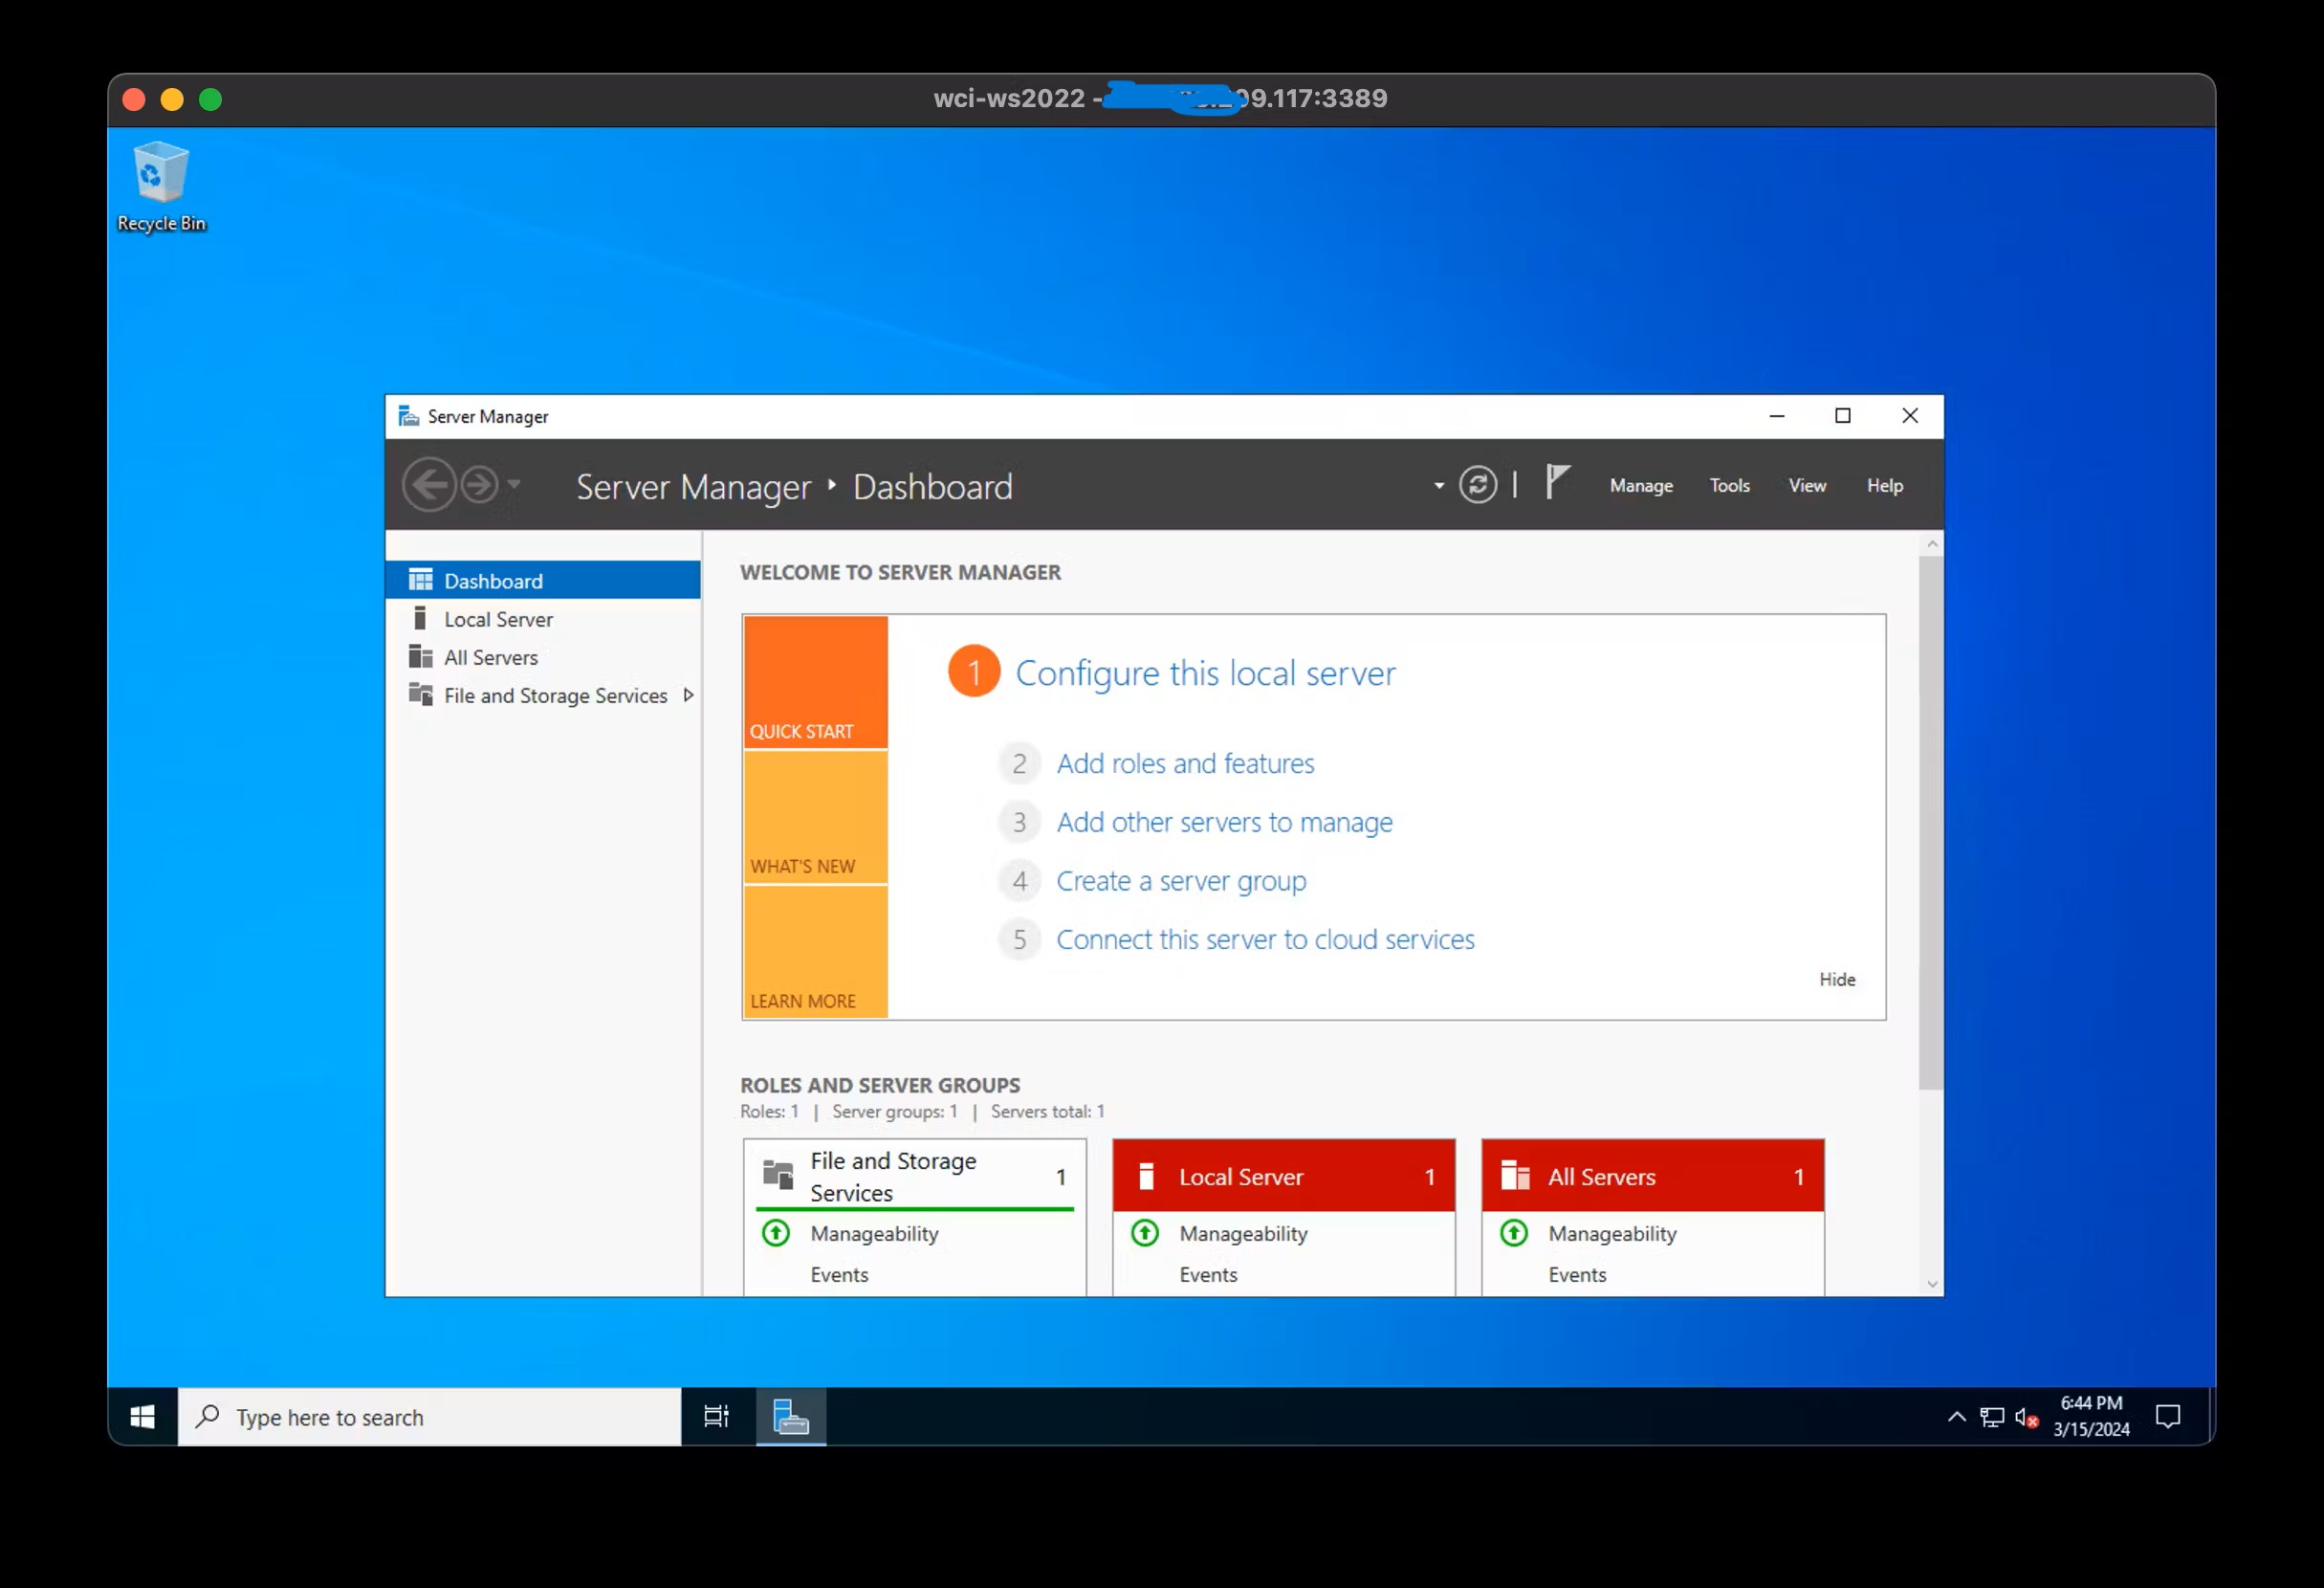
Once you have logged in with the password you set in the previous section, you should land on a similar window:
Enable Containers Feature
For now, we will just enable process-isolated containers feature only. For all intents and purposes, we won’t need the hyper-v isolated containers for the time being.
Open PowerShell as admin (by default you are admin if you were following the above instructions), and run this:
Enable-WindowsOptionalFeature -Online -FeatureName Containers -All
Do you want to restart the computer to complete this operation now? Choose Y, give ~2 min for the VM to restart and connect to it again.
Tools of Trade
Let’s download and install some tools of trade that we will use throughout this series. Feel free to read more about them in your spare time, but for now, let’s just install them:
Install and test Docker:
Run this script from MS Docs:
Invoke-WebRequest -UseBasicParsing "https://raw.githubusercontent.com/microsoft/Windows-Containers/Main/helpful_tools/Install-DockerCE/install-docker-ce.ps1" -o install-docker-ce.ps1
.\\install-docker-ce.ps1
You should see something like:
Querying status of Windows feature: Containers...
Feature Containers is already enabled.
DOCKER default
Checking Docker versions
Downloading https://download.docker.com/win/static/stable/x86_64/docker-25.0.4.zip> to C:\\Users\\wci\\DockerDownloads\\docker-25.0.4.zip
Installing Docker... C:\\Users\\wci\\DockerDownloads\\docker-25.0.4\\docker\\docker.exe
Installing Docker daemon... C:\\Users\\wci\\DockerDownloads\\docker-25.0.4\\docker\\dockerd.exe
Configuring the docker service...
Waiting for Docker daemon...
Successfully connected to Docker Daemon.
The following images are present on this machine:
REPOSITORY   TAG       IMAGE ID   CREATED   SIZE

Script complete!
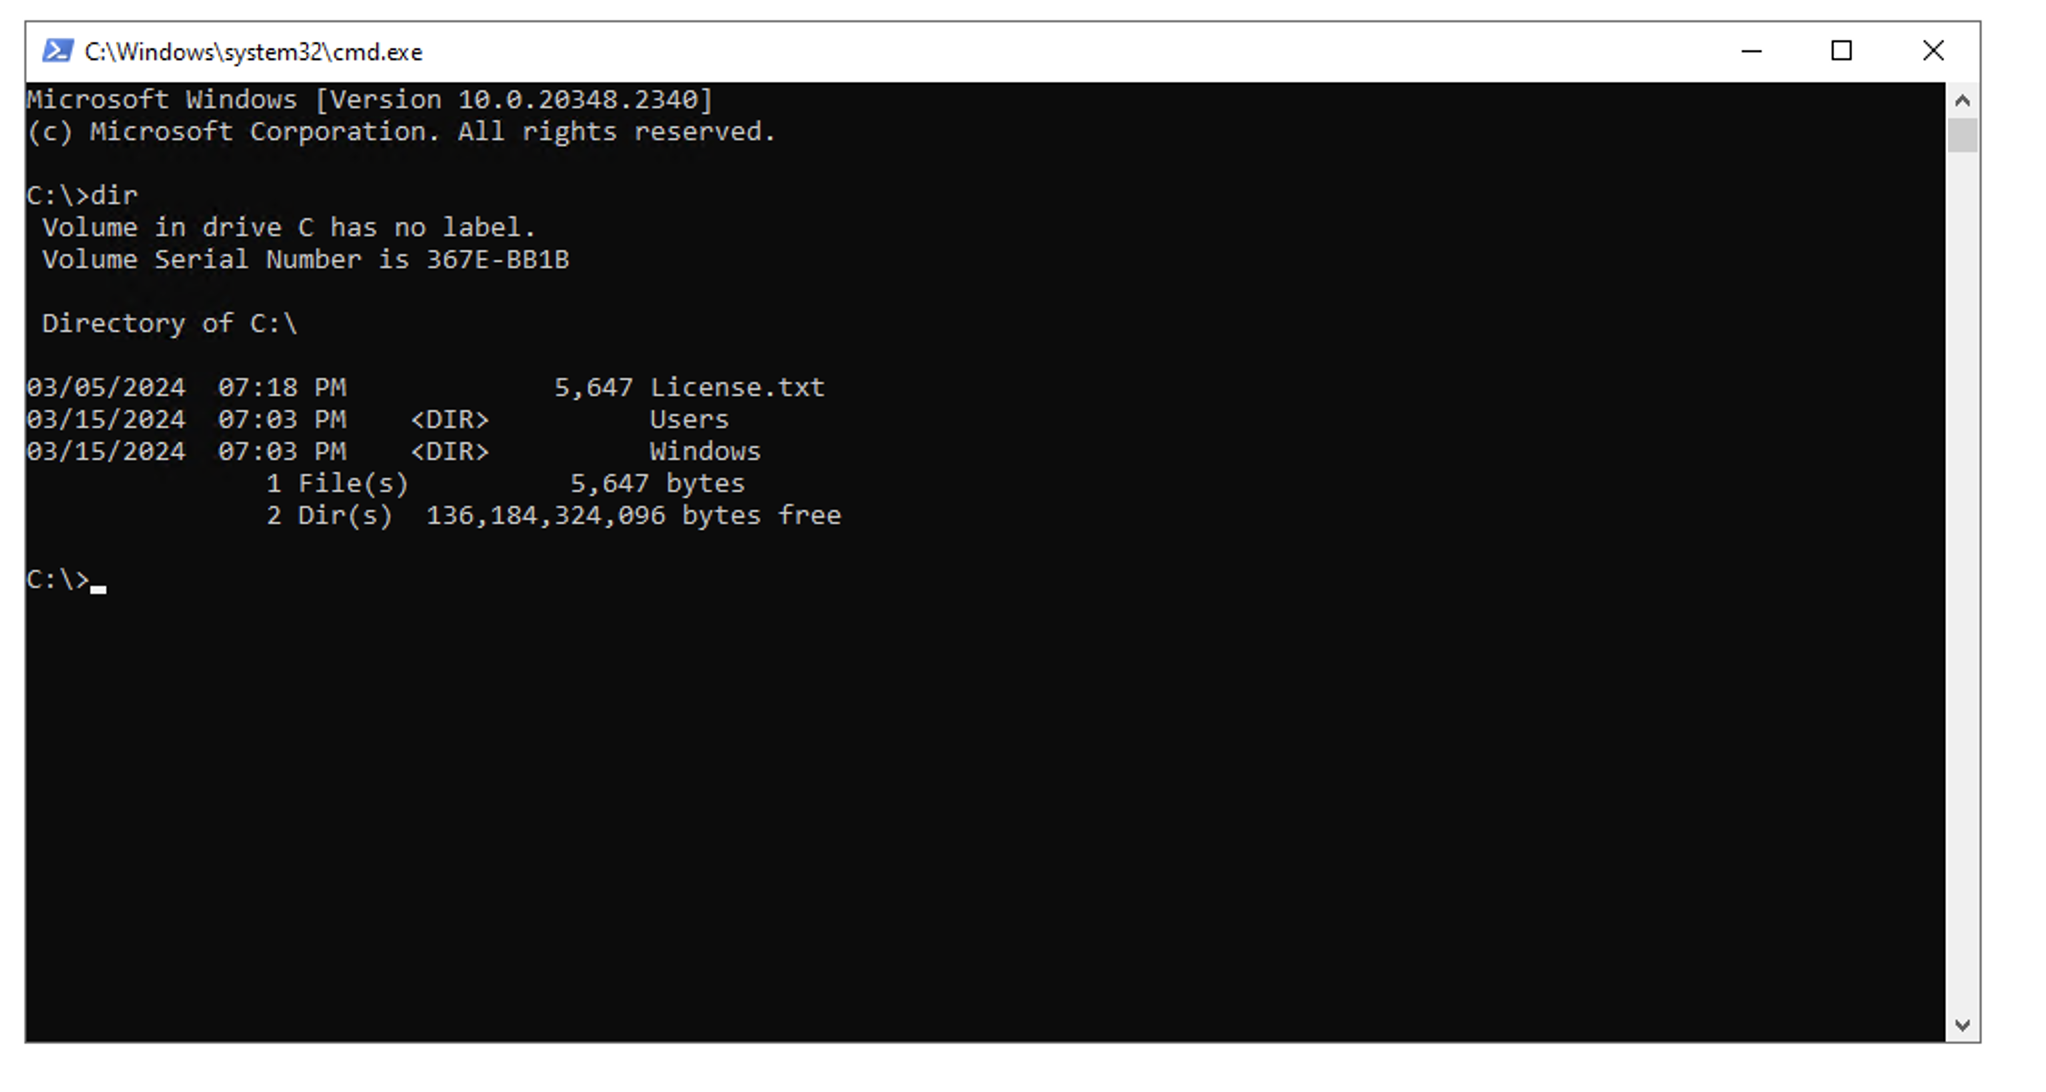
Let’s run a sample container:
docker run -it mcr.microsoft.com/windows/nanoserver:ltsc2022 cmd
This will pull the image from the registry and run it. You will end up in a cmd prompt, run dir and it should be something like this:
If you completed that, congrats! That’s the main part.
Install Other Tools
mkdir C:\\bin # we will put most of these exes in C:\\bin
SysInternals Suite — just download, unzip and put the binaries in say
C:\\binand addC:\\bin\\sysinternalson your path.cd bin curl.exe -LO https://download.sysinternals.com/files/SysinternalsSuite.zip mkdir sysinternals tar.exe xvf SysinternalsSuite.zip -C sysinternals # add C:\\bin\\sysinternals to the $env:PATHTools by Pavel Yosifovich - they are all open-source, get the code linked here if curious.
  curl.exe -L `
      https://github.com/profnandaa/PavelTools/archive/refs/tags/latest.zip `
      -o pavel-tools.zip
  tar.exe xvf pavel-tools.zip
  # optional, rename the directory
  mv .\\PavelTools-latest pavel_tools
  # add C:\\bin\\pavel_tools to the $env:PATH
WinDbg - we’ll use it for reverse engineering and debugging, down the line.
Tip found from @awakecoding on X
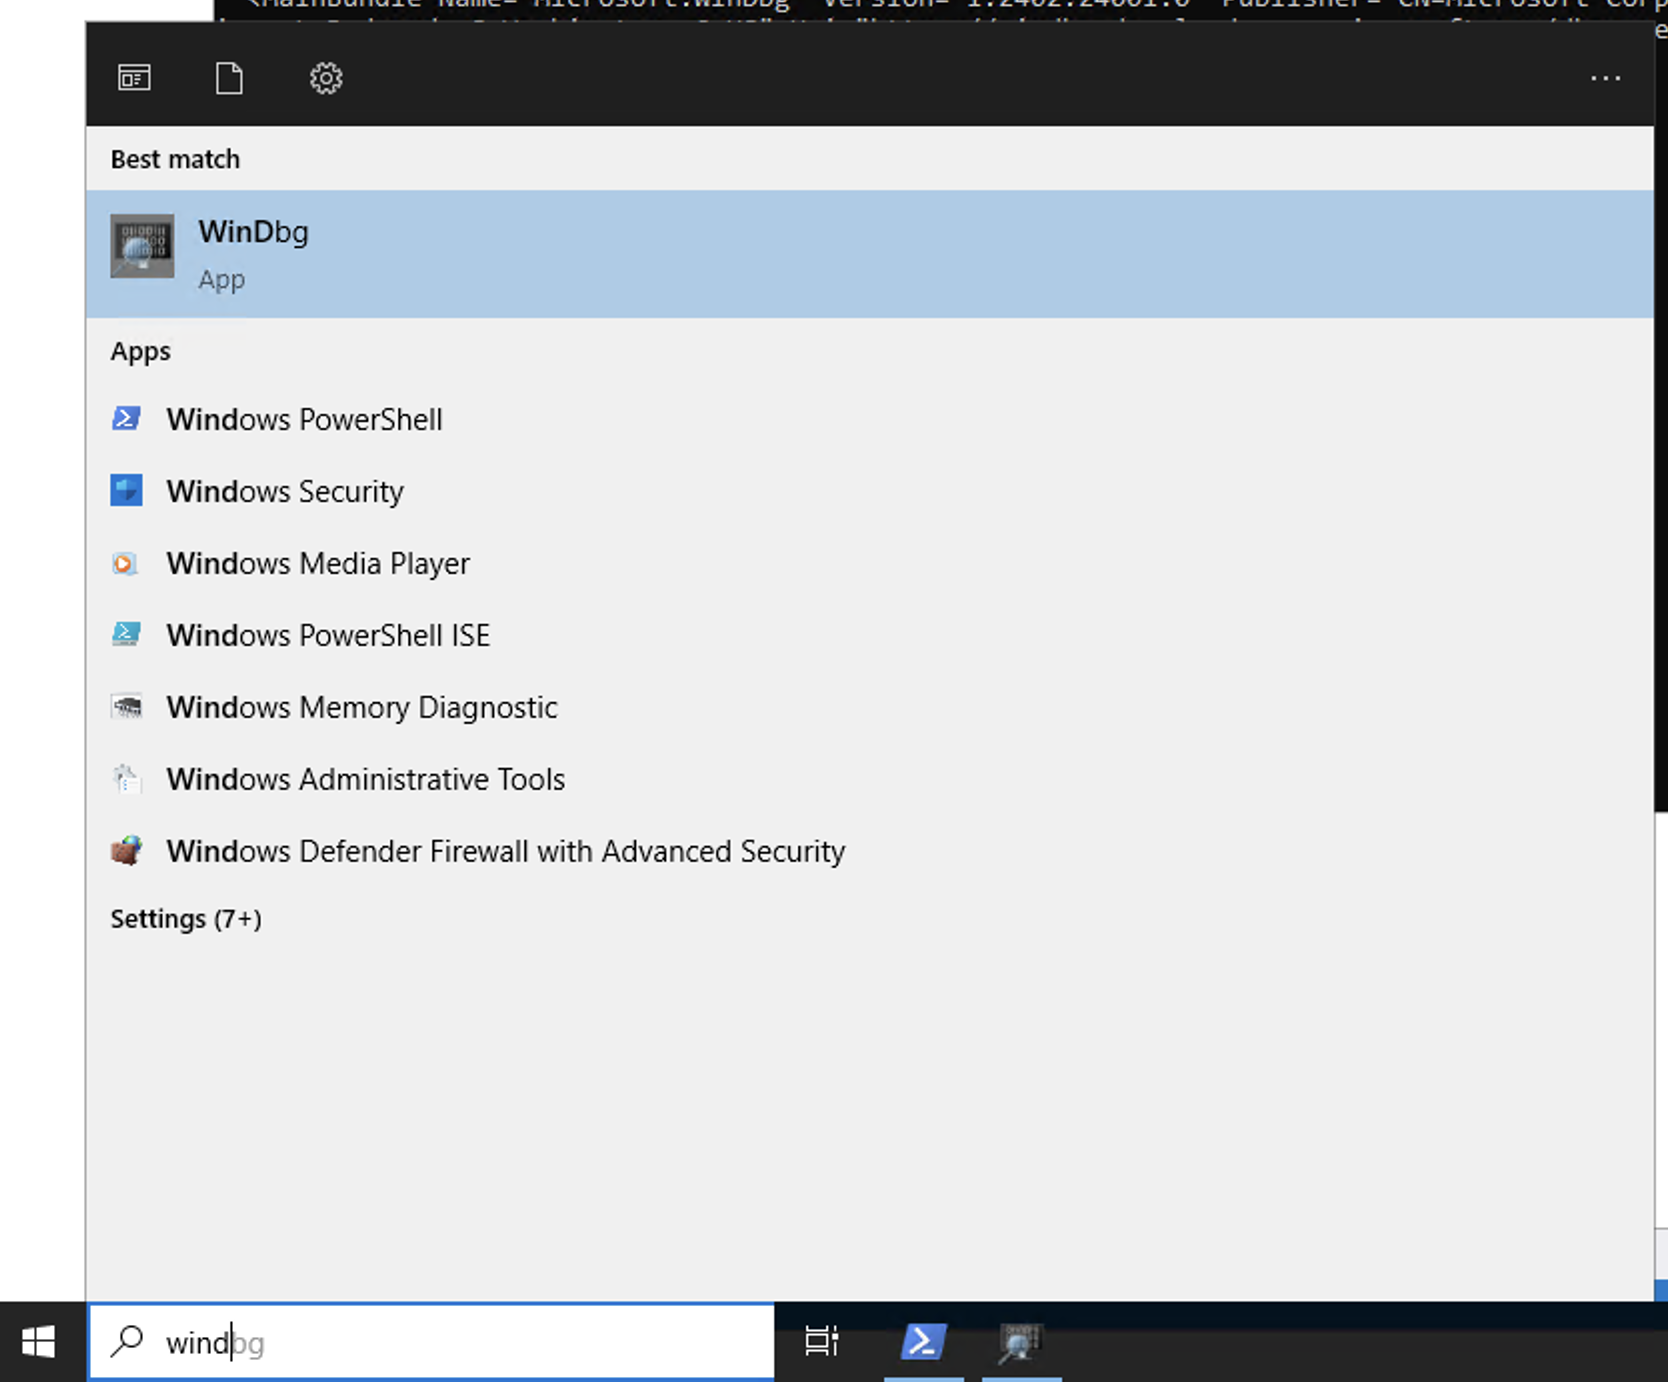
  # Download AppInstaller
  curl.exe -L https://aka.ms/windbg/download -o windbg.appinstaller
  # Get the URL for te MSIX bundle, look for "URI=" in the XML
  type .\\windbg.appinstaller
  <?xml version="1.0" encoding="utf-8"?>
  <AppInstaller Uri="<https://windbg.download.prss.microsoft.com/dbazure/prod/1-0-0/windbg.appinstaller>" Version="1.2402.24001.0" xmlns="<http://schemas.microsoft.com/appx/appinstaller/2018>">
    <MainBundle Name="Microsoft.WinDbg" Version="1.2402.24001.0" Publisher="CN=Microsoft Corporation, O=Microsoft Corporation, L=Redmond, S=Washington, C=US" Uri="<https://windbg.download.prss.microsoft.com/dbazure/prod/1-2402-24001-0/windbg.msixbundle>" />
    <UpdateSettings>
      <OnLaunch HoursBetweenUpdateChecks="0"/>
      <AutomaticBackgroundTask/>
      <ForceUpdateFromAnyVersion>true</ForceUpdateFromAnyVersion>
    </UpdateSettings>
  </AppInstaller>
  # download the MSIX bundle
  curl.exe -LO https://windbg.download.prss.microsoft.com/dbazure/prod/1-2402-24001-0/windbg.msixbundle

  # install the package
  Add-AppPackage .\\windbg.msixbundle
You will have your WinDbg installed:
Congratulations! 🎉 Now we are ready for the flight. Fasten your seatbelts.
As it’s our custom, if you came this far, here is something to hit you for your pain. See you soon!